Your Cart is Empty

Ableton Live 10 has been a long time coming. Three years, in fact — which, if you think about it, is actually pretty generous on Ableton’s part. Whereas other software companies expect their users to fork out for a paid upgrade every year, or try to force us all onto subscription plans, Ableton have given us a ton of stuff for free in the various point upgrades to Live 9. So with Live 10, they’ve gone even further, thrown the rulebook out of the window, changed the game and reinvented music software from the ground up… right? Well, no. At least, not on the outside. In fact, you might be looking at the list of new features and wondering whether things like “I/O renaming” and “Note chasing” really justify parting with the upgrade price, especially if you’re not a Live Suite user and so don’t get the fancy new Wavetable and Echo devices. If so, don’t be too hasty in writing off Live 10, because although some of these new features might not sound all that impressive on paper, they have the potential to make a huge difference to the Live experience.
Let’s take Capture, for example. A simple idea, but one that tackles a really basic issue with the psychology of music-making: red light syndrome. We’ve all had the unfortunate experience of merrily jamming away on a keyboard or MIDI controller, coming up with a stream of great ideas that suddenly seem to vanish from our heads the moment we try to knuckle down and hit
Record. Well, with Capture, that needn’t be a problem. Whenever you arm a MIDI track, Live 10 is sneakily keeping track of everything you play through it, so any time your bandmate says ‘Whoa! What was that you just played? That was awesome!’ you don’t need to try to play it again. Live has done the job for you: hit the Capture button and your little gem will not only be remembered, but tidied up and neatly fitted to tempo. You can even Capture overdubs to existing MIDI clips.
Let's start out with the nitty gritty, this section leads into some of the best sample packs surrounding Ableton specific. If you haven't already, be sure to check out our article "Best Ableton Packs". It goes into detail around some of our music engineer picks surrounding the new DAW. Not to mention it covers various free sample packs that you can use when starting your journey with Ableton 10 including. Now back to your tutorial!
And talking of existing clips, how many times have you found yourself continually having to switch back and forth between two or more different clips in the Detail editor when you want to figure out why your kick drum beats aren’t quite lining up with the bass line? With Live 10, you’ll never need to do this again, because it’s now possible to edit multiple clips simultaneously in the Detail editor. Up to eight Clips from anywhere in the Session or Arrangement Views can be displayed at once, and even if they’re in different places on the Arrangement timeline, Live 10 will intelligently line them all up in a way that makes musical sense.
Speaking of the Arrangement View, the first time you see a session in Live 10 you might think that Ableton have taken features away instead of adding them, because it will look kind of…empty. This is partly the result of a whole raft of subtle graphical improvements, but mainly due to changes in the way you work with automation. In older versions of Live, both automation lines and clip fades were always visible, and there were times when you’d end up moving automation points when you meant to do something else. In Live 10, there are two editing modes, toggled by hitting the lower-case ‘a’ key. In the default mode, automation is hidden, but fades are editable and more visible than they were previously. Hitting ‘a’ switches to a new view designed expressly for editing automation, with fades shown only in the title bar of the clip.
This change doesn’t only make it easier to see what’s going on in your session; it also makes editing more immediate. You can stretch, mute or reverse sections of clips directly within the Arrangement View, and the left and right arrow keys now act as ‘nudge’ controls. With automation hidden, hitting one of these keys moves the selected clip left or right along the timeline by a small amount; with automation visible, it’s the automation curve that moves. You can even keep the boundary of a clip fixed within the timeline and slide its contents left or right, which is really useful when a clip represents a short section from a longer audio file.
Track grouping has also received a shot in the arm in Live 10. In previous versions, this was one area where the program lagged behind more conventional DAWssuch as Pro Tools or Cubase. You could bunch together tracks into a group, but you couldn’t group groups. Why would you want to do this? Well, there are loads of reasons. You might, for example, want to
have all the individual tracks for a drum kit recording grouped, and then combine these further with some percussion and drum machine tracks, so that you have a higher-level group containing all your rhythmic elements. And now, in Live 10, you can. Groups can be any number of layers deep, which makes working with complicated sessions infinitely easier. No matter how many elements you have within your session, it’s now possible to make it all fit onto one screen!
Browsing is another aspect of music software that it’s hard to get excited about, but think about it for a second and you’ll realize just how central it is to the Live experience. The improvements Ableton have made in this department can help you make music much more quickly and fluidly. Chief among them is Collections, which sounds absurdly simple but can make a real difference
to the way you work. Collections gives you a set of seven colored labels or tags, which can be attached to almost anything in the right-hand pane of the browser: Live Sets, devices, presets, files or folders. Collection labels are not specific to a particular Set, so anything you label will always have that label attached, and individual items can bear multiple labels. This makes for a
brilliantly fast tool for quickly grouping disparate collections of things together in a way that might make sense only to you. Maybe you like to mentally categories sounds according to how they make you feel, or what smell they bring to mind?
Oh, and what about the features we mentioned right at the start: I/O renaming and note chasing? The first of these can be a life-saver if you have an audio interface with lots of inputs and outputs. Let’s say you have a bunch of hardware synths and some external effects units, all connected directly to line inputs and outputs on your interface. Previously, it was up to you to
remember that input number 7 was the audio out from your Minimoog, or that output 5 fed the Space Echo which returned to input 5. Now, you can give all these inputs and outputs meaningful names, allowing you to route tracks and sends directly to ‘Space Echo’ or ‘Headphones’.
Note chasing, meanwhile, is not an obscure event in the Winter Olympics but a feature that ensures your Set always sounds right no matter where you begin playback. Previously, if you dropped the playhead into the middle of a clip, notes that started before the playback position were ignored, even if they overlapped that position. Note chasing means that Live 10 playback will include not only notes that start on or after the initial playback position, but sustained notes that began at an earlier point. Very handy if you use a lot of drones or pedal notes!

Another small but really useful option that’s been added to Live is split stereo panning. In previous versions, all tracks had a single pan control; if the source material was stereo, moving this to the left or right changed the balance, and if you took it all the way to the left, both halves of the stereo file would appear in the left channel. What you couldn’t do was, for example, swap the pan positions of the left and right channels, or bring them both in towards the middle, or have one hard-panned while leaving the other centred. Right-click a Live 10 pan control, and you get the option to switch to Split Stereo Panning. This, in effect, gives you separate panners for the left and right channels in a stereo track, allowing you to pan them completely independently of one another. This panning can, of course, be automated, so if you want your left and right channels to periodically swap sides, this is easily arranged.
Finally, of course, if you’re a Live Suite user, you’ll also have the new Wavetable, Echo and Pedal devices, not to mention Max for Live, which is now installed alongside Live Suite with no additional work required on the user’s part. The web will soon be awash with tutorials for these, so we won’t go into detail here, but we shouldn’t overlook another new device that’s included with both the Suite and Standard editions. Drum Buss is a powerful tool designed to take a full drum kit track or group as its input, and spit out something that sounds the same only better. A particularly interesting feature here is the inclusion of a resonant low-pass filter that can be tuned in musical pitches as well as in Hertz. Try adding some instant welly to your kick drums by tuning it to a bass note that fits the key and cranking up the Boom control.
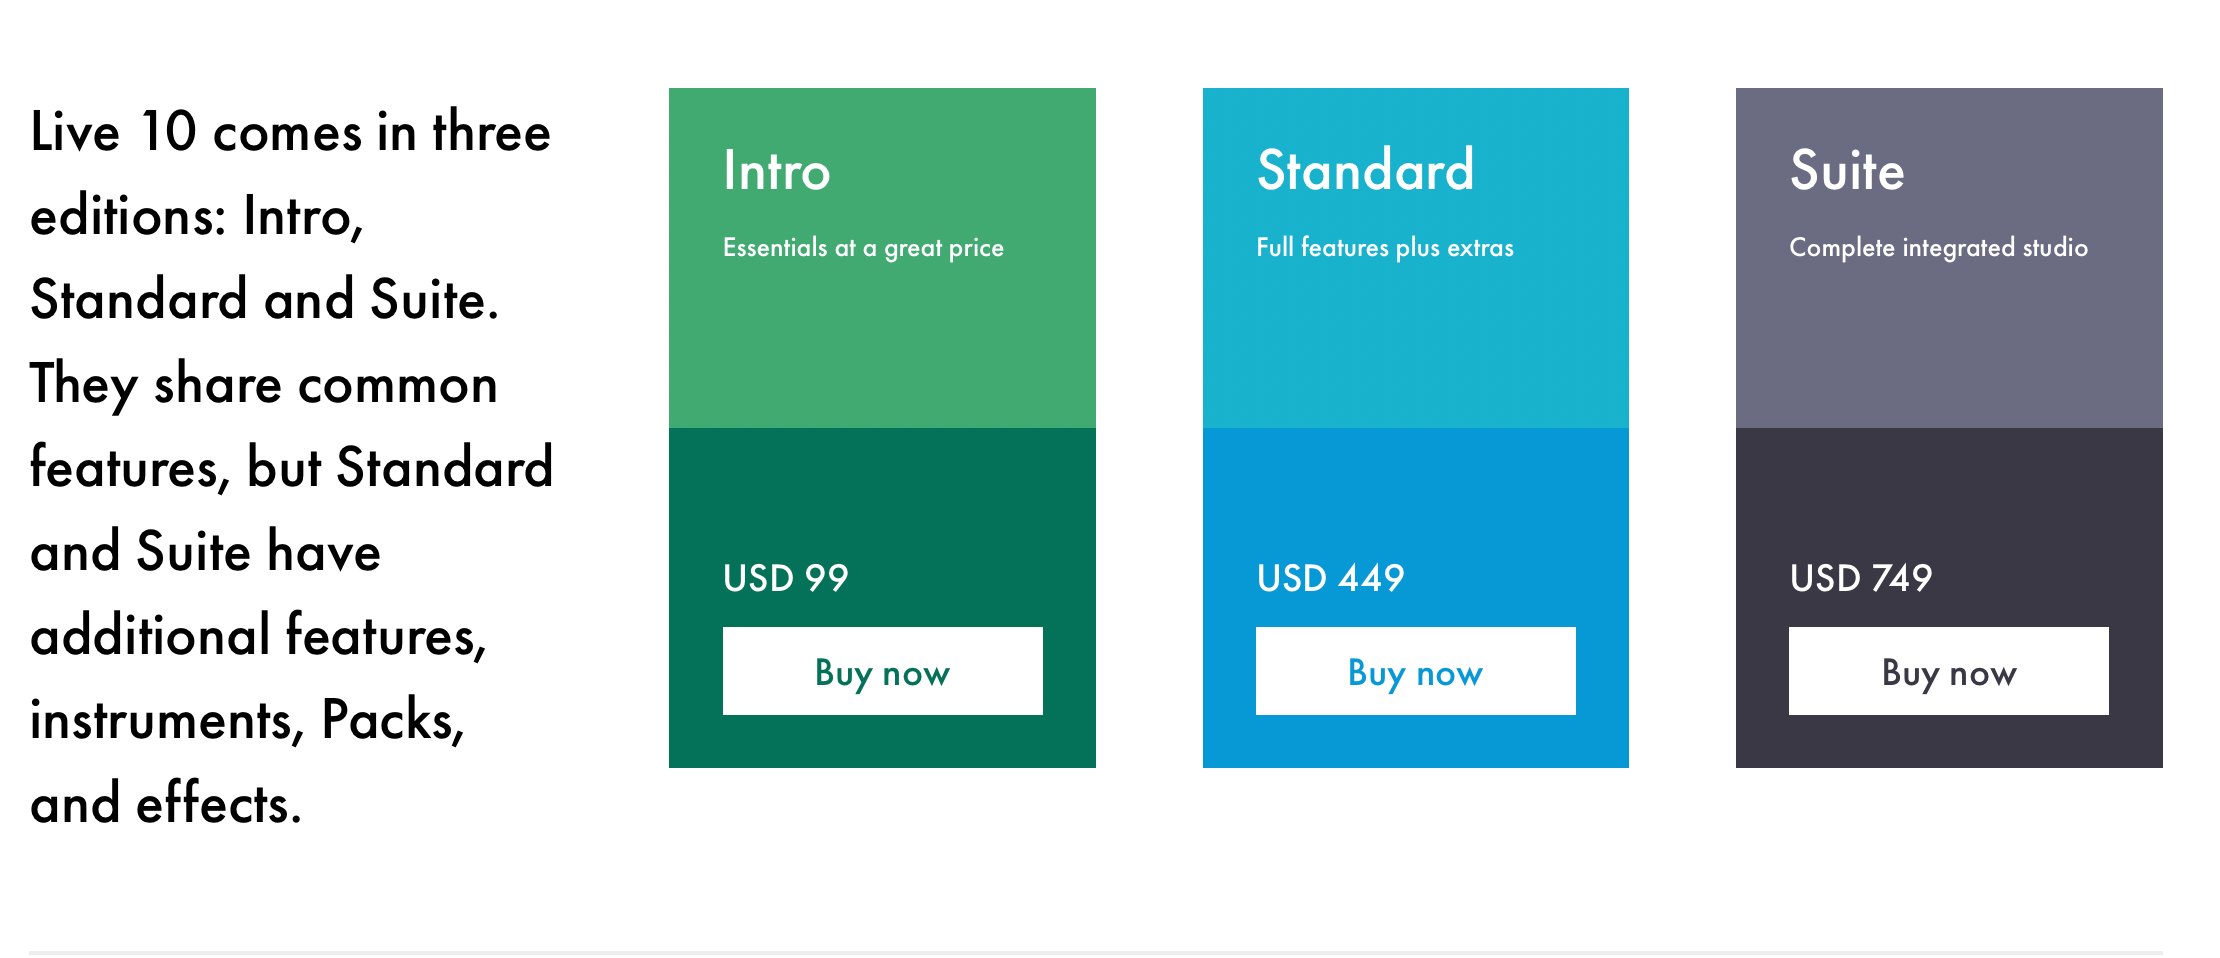
Software: Ableton Live 10
Pricing: Intro 99$, Standard $449, Suite $749
Website: https://ableton.com/en/shop/live/